Set up the Stage
Getting started · 4 min read ·
The Stage is one browser source in OBS that shows everything Roadie puts on stream. Add it once, configure a source, put it in a view, and test it.
The Stage is how Roadie shows things on stream: clips, alerts, polls, trivia, giveaways. Set it up once in OBS, then decide what it shows from Roadie. The Onboarding guide walks you through these five steps and ticks each one off when Roadie sees it working.
How the Stage works
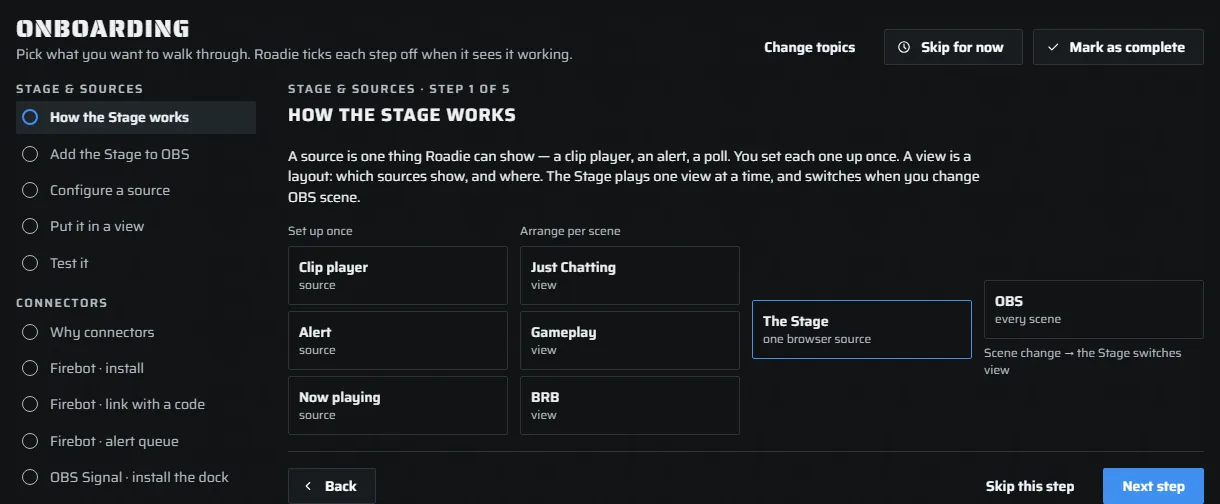
Three words do all the work.
- A source is one thing Roadie can show: a clip player, an alert, what's playing on Spotify. You set each one up once.
- A view is a layout: which sources show, and where. Make one per scene if you like: Just Chatting, Gameplay, BRB.
- The Stage plays one view at a time. It is the one browser source you add to OBS.
When you change scene in OBS, the Stage can switch to the view you matched to that scene. That needs a connector that can see OBS: see How OBS connectors keep Stage views and alerts in sync.
Add the Stage to OBS
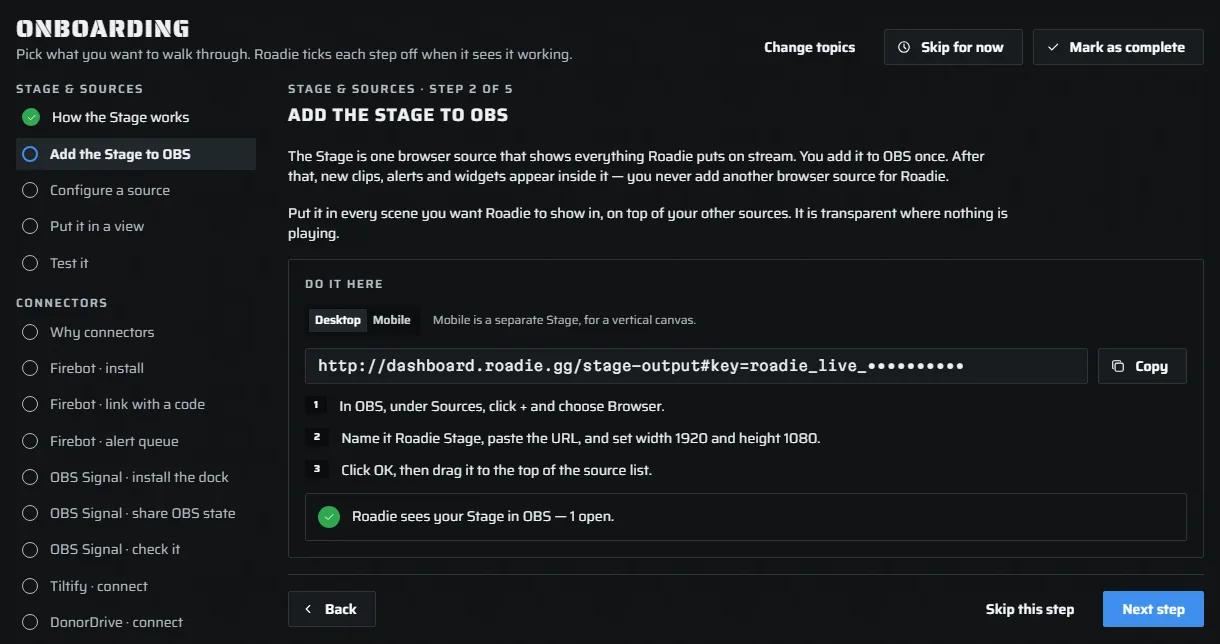
- In the guide, choose Desktop (or Mobile, a separate Stage for a vertical canvas) and press Copy beside your Stage URL.
- In OBS, under Sources, press + and choose Browser.
- Name it Roadie Stage, paste the URL, and set the width to 1920 and the height to 1080.
- Press OK, then drag Roadie Stage to the top of the source list.
Put it in every scene you want Roadie to show in. It is see-through wherever nothing is playing. You never add another browser source for Roadie: new clips, alerts and widgets all appear inside this one.
The step turns green when Roadie sees your Stage open in OBS.
The Stage URL holds a key that lets anything showing it play on your stream. Keep it private, the same as a stream key.
Configure a source
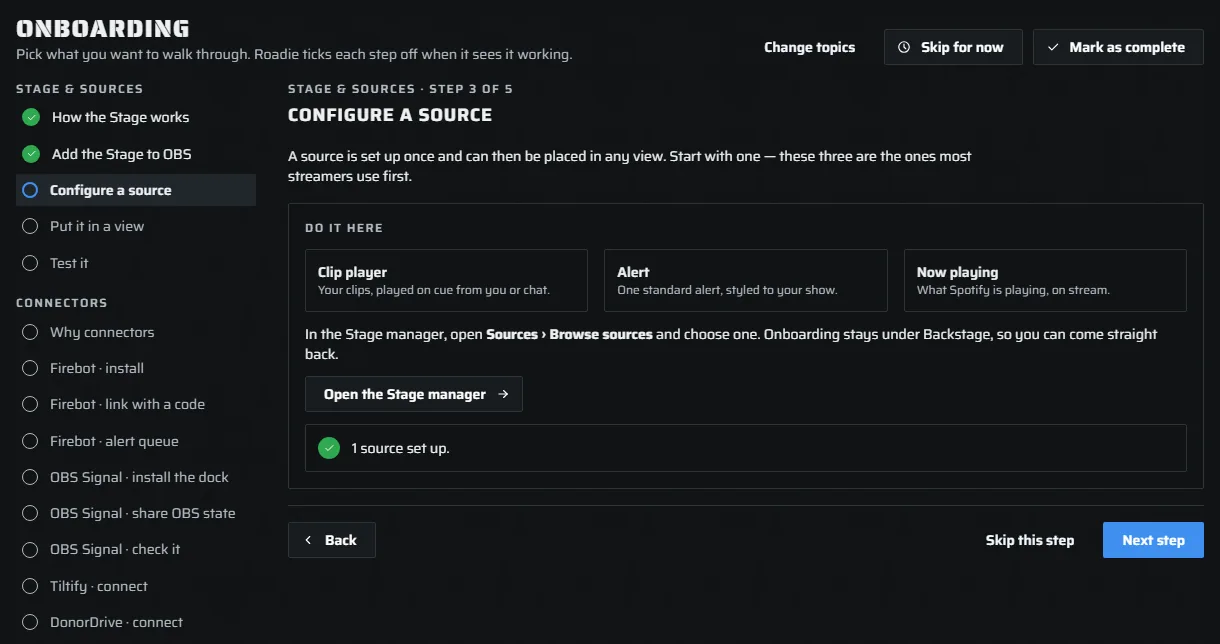
Start with one source. These three are the ones most streamers use first:
- Clip player: your clips, played on cue from you or chat.
- Alert: one standard alert, styled to your show.
- Now playing: what Spotify is playing, on stream.
Press Open the Stage manager, then open Sources › Browse sources and choose one. Change any of its settings, or none, and save. To come back to the guide, open Onboarding under Backstage in the menu. The step has already turned green.
Put it in a view
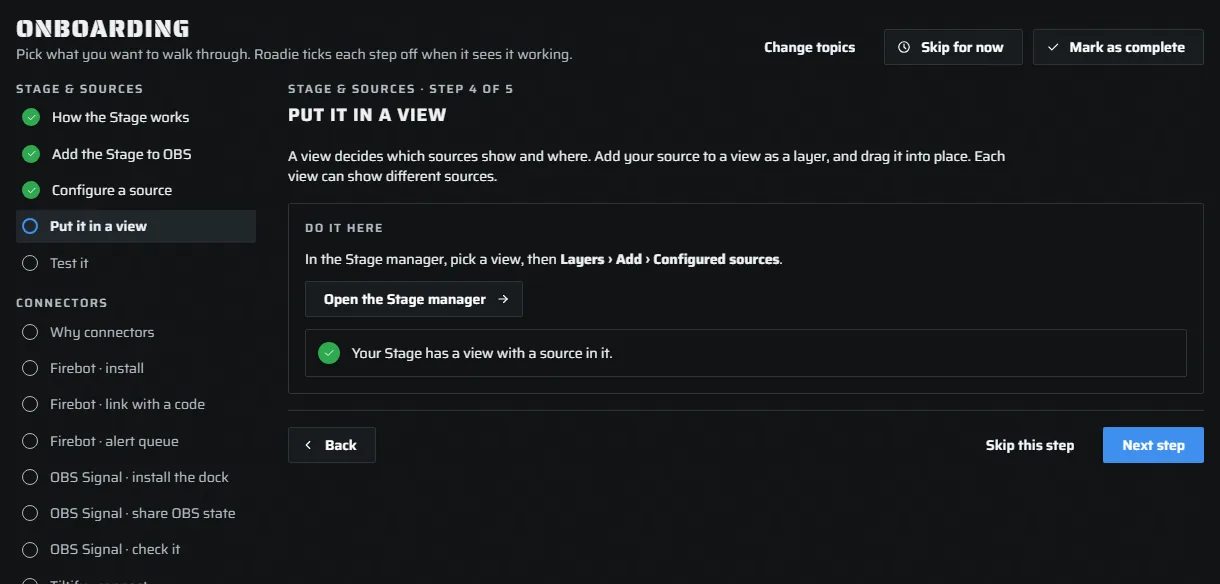
A source shows on stream only once it is in a view. In the Stage manager, pick a view, then choose Layers › Add › Configured sources and pick your source. Drag it where you want it on the canvas. Each view can show different sources.
The step turns green when a view holds a source.
Test it
In the Stage manager, open Test Stage and send a sample. Watch it play in OBS, where you placed it. If you are live, your viewers see it too, so test before you go live.
Not on Windows, or no OBS?
The Stage is a plain browser source, so it works in any OBS on any system, and in other streaming software that has a browser source. The OBS plugin is optional: see Using Roadie in OBS without the plugin.